Tuesday, January 28, 2025
How to Build a Pallet Bar for Outdoor Entertainment
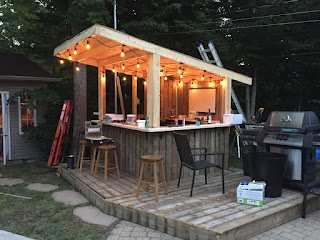
Crafting Your Dream Outdoor Pallet Bar: A Step-by-Step Guide
Transform discarded pallets into the star of your next outdoor gathering! This detailed guide shows you how to build a rustic yet stylish pallet bar perfect for entertaining friends and family. Forget overpriced, mass-produced options â€" let’s create something unique and personalized, brimming with character and charm.

Gathering Your Supplies: A Foundation for Success
Before you dive into the exciting construction phase, assemble your essential materials. This ensures a smooth and efficient building process. Don't skip this step! A well-stocked arsenal of materials makes all the difference between a frustrating experience and a truly rewarding project.
Essential Materials:
- Two sturdy wooden pallets (inspect for splinters and any potential hazards before beginning)
- Wood screws (various lengths depending on pallet thickness and desired stability)
- Sandpaper (various grits for smoothing rough edges and surfaces)
- Wood stain or paint (choose a color that complements your outdoor space)
- Wood sealant (to protect the bar from the elements and extend its lifespan)
- Measuring tape and level
- Drill with appropriate drill bits
- Safety glasses and work gloves
- Optional: Bar accessories like bottle openers, cup holders, or a shelf for glasses
Building the Bar: A Creative Construction Process
Now comes the fun part â€" constructing your unique pallet bar! This section details each step, transforming those simple pallets into a functional and eye-catching outdoor centerpiece. Take your time, and remember, precision is key for a truly stunning result.
Step 1: Prepare the Pallets
Begin by thoroughly cleaning the pallets. Remove any loose nails, splinters, or debris. Sand down any rough edges and surfaces to ensure a smooth, safe finish. This initial preparation significantly improves the overall quality and safety of your finished bar.
Step 2: Assemble the Base
Securely fasten the two pallets together to create a sturdy base. Use longer screws to ensure stability, drilling pilot holes beforehand to prevent the wood from splitting. Position the pallets so the base is wide and stable enough to support your drinks and bar accessories.
Step 3: Optional Enhancements
Enhance your bar's functionality and style with additions like a bottle opener mounted to the side, additional shelving for glasses, or even built-in cup holders. Get creative! These small touches personalize your creation and elevate its overall appeal.
Step 4: Finishing Touches
Apply your chosen wood stain or paint, ensuring even coverage and allowing ample drying time between coats. Once dry, apply a wood sealant to protect the bar from weather damage and extend its lifespan. This vital step safeguards your investment and ensures years of enjoyment.
Final Touches and Placement: Showcasing Your Creation
Once your pallet bar is fully dry and sealed, it’s time to find its perfect outdoor location. Consider factors like shade, proximity to other seating areas, and overall aesthetic appeal. Choose a spot that makes your new bar a true focal point of your outdoor entertaining space.
Congratulations! You've successfully built your very own outdoor pallet bar. Now it's time to stock it with your favorite beverages and host the party of the year!
No comments:
Post a Comment
Note: Only a member of this blog may post a comment.