Tuesday, January 28, 2025
DIY Wooden Guitar Kits: Build Your Own Instrument
DIY Wooden Guitar Kits: Build Your Own Instrument
Have you ever dreamt of owning a guitar crafted entirely by your own hands? The satisfying smell of freshly sanded wood, the precision of fitting each component, the thrill of playing your unique creation â€" building a guitar from a kit offers an unparalleled journey into the world of lutherie. Forget mass-produced instruments; embrace the artistry and personal connection that comes with constructing your own. DIY wooden guitar kits provide an accessible gateway to this rewarding experience, regardless of your prior woodworking skills. With patience, precision, and a little guidance, you can bring your musical vision to life.

Choosing Your Kit: Finding the Right Fit
The first step in your guitar-building adventure is selecting the perfect kit. The market offers a wide variety of options catering to different skill levels and musical tastes. Consider the type of guitar you wish to build: acoustic, electric, or even ukulele. Each presents unique challenges and rewards. Beginner kits often include pre-cut wood pieces and simplified instructions, minimizing the initial learning curve. More advanced kits may require more intricate shaping and assembly, appealing to experienced woodworkers. Carefully examine the kit's components: ensure all necessary parts are included and that the quality of the wood aligns with your expectations. Reading reviews and comparing different suppliers will help you make an informed decision.

Factors to Consider When Choosing Your Kit:
- Your skill level: Beginner, intermediate, or advanced.
- Type of guitar: Acoustic, electric, classical, ukulele.
- Wood type: Different woods offer varying tonal qualities and aesthetic appearances.
- Kit components: Pre-cut wood, pre-drilled holes, included hardware.
- Supplier reputation: Read reviews and check for customer support.
The Building Process: A Step-by-Step Guide
Once you've received your kit, take your time to familiarize yourself with the instructions and components. Most kits provide detailed, step-by-step guidance, often accompanied by helpful diagrams or videos. Start with the body, carefully assembling the sides and back, ensuring a tight and accurate fit. This stage often involves gluing and clamping, requiring patience and attention to detail. Next, attach the neck, ensuring correct alignment and angle. Fretting the neck is a critical step demanding precision and the right tools. Finally, install the bridge, tuning pegs, and strings. Remember, taking your time is crucial; rushing can lead to mistakes that are difficult to correct.
Essential Tools for Guitar Building:
- Wood glue
- Clamps
- Sandpaper (various grits)
- Files
- Screwdrivers
- Measuring tools (ruler, caliper)
- Fretting tools (optional, depending on kit)
Finishing Touches and Beyond
After assembling your guitar, the finishing touches are where you can truly personalize your creation. Sanding the wood to a smooth finish is essential before applying any stain or varnish. Choose a finish that complements the wood and protects it from damage. Experiment with different finishes to achieve the desired look and feel. Once the finish is dry, string your guitar and carefully tune it. This is the moment of truth â€" the culmination of your hard work. The first chords you play on your handmade instrument will resonate with a unique sense of accomplishment. Beyond simply playing your creation, you'll gain a deeper appreciation for the artistry and craftsmanship involved in guitar making.
Beyond the Kit: Customizing Your Guitar
Many builders choose to personalize their guitars beyond the kit's standard components. Consider adding custom inlays, changing the pickguard, or even modifying the electronics (for electric guitars). This allows for truly unique and personalized instrument. The possibilities are endless, limited only by your imagination and skill. Your DIY guitar journey doesn’t end with the final chord; it's the beginning of a lifelong connection with the instrument you've painstakingly built.

DIY Shaker Furniture for Beginners: Simple Plans (Free PDF)
DIY Shaker Furniture for Beginners: Simple Plans (Free PDF - Coming Soon!)
Hey there, fellow furniture enthusiasts! So you're dreaming of crafting your own beautiful, minimalist Shaker-style furniture, but the thought of tackling a complex project seems a little daunting? Don't worry, you're not alone! Shaker furniture, with its clean lines and simple elegance, is totally achievable, even for absolute beginners. This guide will walk you through everything you need to know to build your first piece, and while the free PDF plans aren't quite ready yet (we're working on getting them polished up!), this will give you a great head start.
Understanding the Shaker Aesthetic
Before we dive into the how-to, let's appreciate the "why." What makes Shaker furniture so special? It's all about functionality and simplicity. Think clean lines, minimal ornamentation, and a focus on honest craftsmanship. No fussy details, just beautiful, durable pieces built to last. The Shaker style emphasizes practicality and utilitarianism, reflecting the values of the Shaker community. This simplicity translates into projects that are easier to tackle for beginners, even if you're working with limited tools.

Key Characteristics of Shaker Style:
- Simple, straight lines: Avoid curves and ornate details.
- Minimalist design: Functionality is key; there's no room for superfluous elements.
- Dovetail joints (often): While not strictly essential for a beginner piece, dovetails add a touch of authentic Shaker craftsmanship.
- Natural wood finishes: Enhance the beauty of the wood grain with clear finishes rather than bold colors.
- Functionality over form: Every piece serves a purpose, and that purpose is reflected in its design.
Choosing Your First Project: Simple & Satisfying
For your inaugural Shaker furniture project, you want something manageable, something that will build your confidence and teach you essential skills without overwhelming you. We're thinking small â€" think nightstand, small shelf, or even a simple stool. Avoid large, complex pieces until you've gotten the hang of the basics.
Project Suggestions for Beginners:
- Simple Shaker-style nightstand: A small, rectangular design with drawers or shelves is perfect.
- Floating shelf: Learn to cut and assemble simple shelves, perfect for displaying books or plants.
- Small Shaker stool: A great introduction to woodworking joints and basic construction techniques.
Once you've chosen a project, find or create some basic plans. A simple sketch will do to start, and then you can refine it as you progress. Remember, you can always adjust plans to suit your skill level and available materials.
Essential Tools and Materials
You don't need a massive workshop to build Shaker furniture! Start with the essentials, and you can always expand your tool collection as your skills improve.
Basic Tool List:
- Measuring Tape and Pencil: Accuracy is key in woodworking.
- Saw (Hand Saw or Circular Saw): For cutting your wood to size.
- Drill and Drill Bits: For pilot holes and screwing things together.
- Screwdriver (Phillips and Flathead): To secure your pieces.
- Clamps: To hold pieces together while the glue dries.
- Sandpaper (various grits): For smoothing surfaces and edges.
- Wood Glue: A vital component for strong joints.
- Safety Glasses and Dust Mask: Always prioritize safety!
Choosing Your Wood:
Pine, poplar, and maple are all excellent choices for beginner Shaker furniture projects. They're relatively easy to work with, affordable, and take a beautiful finish. Consider using pre-cut lumber from your local hardware store to save time.
Step-by-Step Guide (General Principles)
Since the detailed plans are still being finalized for the free PDF, let's focus on the general steps involved in constructing Shaker furniture. These steps apply to most projects, though specifics will vary.
1. Planning and Preparation:
Carefully review your plans. Measure twice, cut once! Ensure you have all the necessary materials and tools before you begin.
2. Cutting the Wood:
Accurately cut your wood pieces to the dimensions specified in your plans. Use a miter saw or circular saw for straight cuts. A hand saw is a great option for more refined work and learning proper techniques.
3. Assembling the Pieces:
Use wood glue and screws to assemble your project. Pre-drill pilot holes to prevent the wood from splitting. Clamps are crucial for keeping everything aligned while the glue dries. For more advanced projects, you might consider learning techniques like dovetail joints. However, for beginner projects, simple butt joints and screws work perfectly.
4. Sanding and Finishing:
Sand all surfaces thoroughly, starting with coarser grit sandpaper and gradually moving to finer grits. This will create a smooth, even surface. Apply a clear finish â€" like a natural oil or varnish â€" to protect the wood and enhance its beauty. Always follow the manufacturer's instructions on the finish you choose.
Troubleshooting and Tips for Success
Don't be discouraged if things don't go perfectly the first time. Woodworking is a skill that takes time and practice to master. Here are a few tips to help you along the way:
- Take your time: Rushing can lead to mistakes. Work slowly and carefully.
- Measure twice, cut once: This old adage is crucial in woodworking.
- Use clamps: Clamps are essential for keeping pieces aligned while the glue dries.
- Sand thoroughly: Proper sanding is key to a beautiful finish.
- Don't be afraid to ask for help: If you're stuck, don't hesitate to reach out to experienced woodworkers for advice.
Commonly Asked Questions
We anticipate several questions, so let's address some of the most common ones here:
- Q: When will the free PDF plans be available? A: We're aiming to have them ready very soon! Keep an eye on this page for updates.
- Q: What kind of wood is best for beginners? A: Pine, poplar, and maple are excellent choices. They're readily available, relatively inexpensive, and easy to work with.
- Q: Do I need expensive tools? A: No, you can start with a basic set of tools and gradually expand your collection as you gain experience.
- Q: What if I make a mistake? A: Don't worry! Everyone makes mistakes in woodworking. Learn from them and keep practicing.
- Q: Where can I find more information on Shaker furniture? A: There are many books and online resources dedicated to Shaker design and woodworking techniques. A simple online search will turn up plenty of options.
We hope this guide has inspired you to give DIY Shaker furniture a try! Stay tuned for the release of our free PDF plans, and happy crafting!
Step-by-Step Guide to Building a Wooden Rack
Constructing Your Custom Wooden Rack: A Comprehensive Guide
Tired of cluttered spaces and disorganized tools? Building your own wooden rack is a rewarding project that lets you customize storage to perfectly fit your needs. This detailed guide walks you through each step, from planning to finishing, ensuring you create a sturdy and aesthetically pleasing rack.

Planning Your Rack
Before you pick up a saw, careful planning is key to a successful project. Consider the purpose of your rack. Will it hold tools, firewood, wine bottles, or something else entirely? Measure the space where you intend to place the rack. This dictates its overall dimensions. Sketch a simple design, noting the number of shelves, their spacing, and the overall height and width. Decide on the type of wood. Pine is affordable and easy to work with, while hardwoods like oak offer greater durability and a more sophisticated look. Don't forget to account for the weight the rack will hold; thicker wood is necessary for heavier items.

Choosing Your Materials
Once your design is finalized, create a detailed materials list. This should include the dimensions and quantity of wood you need, screws, wood glue, sandpaper (various grits), wood stain or paint (optional), and any other finishing materials. Purchasing all materials beforehand prevents frustrating delays mid-project. Consider visiting a lumber yard for personalized assistance with wood selection.
Building the Rack
With your materials gathered, it’s time to construct the rack. Begin by cutting the wood according to your measurements. Use a miter saw for precise cuts, ensuring clean, straight edges. If you lack a miter saw, a hand saw and careful measuring will also suffice, though it requires more skill and patience. Always wear safety glasses and a dust mask to protect yourself from flying debris and wood dust.
Assembling the Frame
For added strength, consider using wood glue and screws to assemble the frame. Start by attaching the vertical supports (legs) to the horizontal supports (top and bottom rails). Pre-drilling pilot holes prevents the wood from splitting. Use a level to ensure everything is square and even. Clamp the pieces together while the glue dries for a strong, secure bond.
Adding the Shelves
Once the frame is secure, attach the shelves. Measure and mark the locations for each shelf on the vertical supports. Again, pre-drill pilot holes and use wood glue and screws to secure the shelves. Ensure they are level and evenly spaced. Take your time at this stage for a professional finish.
Finishing Touches
Sand all surfaces of the rack smooth, starting with coarser grit sandpaper and gradually moving to finer grits. This eliminates splinters and prepares the surface for finishing. Apply wood stain or paint according to the manufacturer’s instructions. Several thin coats are better than one thick coat. Allow ample drying time between coats. Consider adding a sealant to protect the wood from moisture and scratches, enhancing its longevity.
Final Inspection and Placement
Once the finish is dry, conduct a final inspection. Make sure all screws are tight, the shelves are secure, and the rack is stable. Carefully place the rack in its designated spot. Admire your handiwork! You've successfully built a custom wooden rack perfectly suited to your needs.
Remember: Safety first! Always wear appropriate safety gear when working with power tools.
How to Build Wooden Chairs at Home
Crafting Comfortable Chairs: A Beginner's Guide to Building Wooden Chairs at Home
The satisfying click of hammer meeting nail, the scent of freshly cut wood, the pride of creating something beautiful and functional with your own two hands â€" building your own wooden chair offers a rewarding experience unlike any other. This guide provides a step-by-step approach to crafting a simple, sturdy chair, perfect for beginners. Remember, safety is paramount! Always wear appropriate safety glasses and use caution when operating power tools.

Planning Your Project: Choosing the Right Design and Materials
Before you even pick up a saw, plan meticulously. Start by selecting a chair design that aligns with your skill level. Numerous free plans are available online â€" search for "simple beginner woodworking chair plans." Consider factors like chair height, seat width, and overall style. For a first project, a simple design with fewer intricate joints is recommended. Once you've chosen a plan, carefully review the cut list and materials required. Select high-quality wood like oak, maple, or pine, ensuring the wood is properly dried to prevent warping. Purchase additional wood to account for potential mistakes. Don't forget essential hardware like screws, wood glue, and finishing materials.

Gathering Your Tools: Essential Equipment for Chair Construction
Building a chair requires a variety of tools. Essential tools include: a measuring tape, pencil, hand saw or circular saw, jigsaw (for curves), drill with various drill bits, clamps, sandpaper (various grits), a wood plane (optional, but helpful for smoothing), and safety glasses. For a more professional finish, consider investing in a random orbital sander. Ensure all your tools are sharp and in good working order before starting the project. A well-maintained toolset contributes significantly to accuracy and safety.
Building the Chair Frame: Assembling the Legs and Seat Supports
Following your chosen plan, accurately cut the wood pieces to the specified dimensions. Pay close attention to detail; precision is crucial for a sturdy and aesthetically pleasing chair. Begin by assembling the legs. Many simple chair designs use mortise and tenon joints or simple butt joints reinforced with screws and wood glue. Clamp the joints firmly while the glue dries, ensuring they are square and aligned. Next, construct the seat supports, attaching them securely to the legs using the chosen joinery method. Take your time and carefully check for squareness at every stage of the process. A perfectly square frame is the foundation of a stable chair.
Adding the Seat and Backrest: Completing the Chair Structure
Once the frame is complete and the glue is dry, attach the seat. You can use a solid wood seat, plywood, or even woven materials. Secure the seat to the seat supports using screws or dowels. For added strength and stability, pre-drill pilot holes to prevent the wood from splitting. Finally, attach the backrest. Depending on the design, this might involve more intricate joinery or simpler methods. Remember to use clamps to hold everything securely while the glue dries completely. Regularly check the alignment of the backrest to ensure it’s properly positioned and comfortable.
Finishing Touches: Sanding, Staining, and Protecting Your Creation
With the chair assembled, the final steps involve refining its appearance and protecting the wood. Begin by sanding all surfaces thoroughly, starting with coarser grits and gradually progressing to finer grits to achieve a smooth finish. Pay particular attention to any uneven areas or rough edges. Once sanding is complete, apply your chosen stain or paint. Follow the manufacturer's instructions carefully, allowing adequate drying time between coats. Finally, apply a protective finish, such as polyurethane or varnish, to shield the wood from moisture and wear. This will extend the life of your chair and maintain its beautiful appearance for years to come.
Celebrating Your Achievement: Admiring Your Handcrafted Chair
Congratulations! You've successfully built your own wooden chair. Take a moment to appreciate the accomplishment â€" the hours of work, the problem-solving, the creation of something beautiful and functional from raw materials. Your handcrafted chair isn't just furniture; it's a testament to your skills, patience, and dedication. Now, sit back, relax, and enjoy the fruits of your labor.
How to Build a Pallet Bar for Outdoor Entertainment
Crafting Your Dream Outdoor Pallet Bar: A Step-by-Step Guide
Transform discarded pallets into the star of your next outdoor gathering! This detailed guide shows you how to build a rustic yet stylish pallet bar perfect for entertaining friends and family. Forget overpriced, mass-produced options â€" let’s create something unique and personalized, brimming with character and charm.

Gathering Your Supplies: A Foundation for Success
Before you dive into the exciting construction phase, assemble your essential materials. This ensures a smooth and efficient building process. Don't skip this step! A well-stocked arsenal of materials makes all the difference between a frustrating experience and a truly rewarding project.
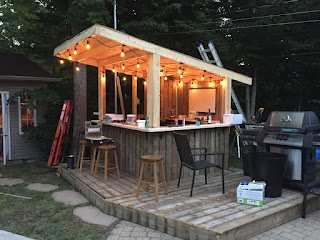
Essential Materials:
- Two sturdy wooden pallets (inspect for splinters and any potential hazards before beginning)
- Wood screws (various lengths depending on pallet thickness and desired stability)
- Sandpaper (various grits for smoothing rough edges and surfaces)
- Wood stain or paint (choose a color that complements your outdoor space)
- Wood sealant (to protect the bar from the elements and extend its lifespan)
- Measuring tape and level
- Drill with appropriate drill bits
- Safety glasses and work gloves
- Optional: Bar accessories like bottle openers, cup holders, or a shelf for glasses
Building the Bar: A Creative Construction Process
Now comes the fun part â€" constructing your unique pallet bar! This section details each step, transforming those simple pallets into a functional and eye-catching outdoor centerpiece. Take your time, and remember, precision is key for a truly stunning result.
Step 1: Prepare the Pallets
Begin by thoroughly cleaning the pallets. Remove any loose nails, splinters, or debris. Sand down any rough edges and surfaces to ensure a smooth, safe finish. This initial preparation significantly improves the overall quality and safety of your finished bar.
Step 2: Assemble the Base
Securely fasten the two pallets together to create a sturdy base. Use longer screws to ensure stability, drilling pilot holes beforehand to prevent the wood from splitting. Position the pallets so the base is wide and stable enough to support your drinks and bar accessories.
Step 3: Optional Enhancements
Enhance your bar's functionality and style with additions like a bottle opener mounted to the side, additional shelving for glasses, or even built-in cup holders. Get creative! These small touches personalize your creation and elevate its overall appeal.
Step 4: Finishing Touches
Apply your chosen wood stain or paint, ensuring even coverage and allowing ample drying time between coats. Once dry, apply a wood sealant to protect the bar from weather damage and extend its lifespan. This vital step safeguards your investment and ensures years of enjoyment.
Final Touches and Placement: Showcasing Your Creation
Once your pallet bar is fully dry and sealed, it’s time to find its perfect outdoor location. Consider factors like shade, proximity to other seating areas, and overall aesthetic appeal. Choose a spot that makes your new bar a true focal point of your outdoor entertaining space.
Congratulations! You've successfully built your very own outdoor pallet bar. Now it's time to stock it with your favorite beverages and host the party of the year!
Pallet Furniture Plans for Small Apartments
Ingenious Pallet Furniture: Maximizing Space and Style in Small Apartments
The constraints of small apartment living often necessitate creative solutions to maximize both space and aesthetic appeal. Traditional furniture can easily overwhelm a compact space, leaving little room for comfortable movement and personal expression. However, repurposing readily available materials, such as discarded shipping pallets, provides an ingenious and cost-effective means of crafting bespoke furniture pieces perfectly suited to the unique dimensions and design preferences of a small apartment. This exploration delves into the diverse possibilities of pallet furniture, providing detailed guidance on design considerations, construction techniques, and stylistic approaches to transform these humble materials into stylish and functional additions to any small living space.

Understanding the Potential of Reclaimed Pallets
Shipping pallets, often discarded as waste, represent a surprisingly versatile resource for crafting unique furniture pieces. Their robust construction, utilizing durable wood, lends itself to a range of applications, from sturdy shelving units to comfortable seating arrangements. The inherent rustic aesthetic of the pallets provides a foundation for a variety of design styles, from minimalist modern to charmingly vintage. However, prior to embarking on any pallet furniture project, several critical considerations must be addressed:

Source and Preparation of Pallets
Sourcing pallets responsibly is paramount. While readily available, not all pallets are created equal. Some may be treated with chemicals unsuitable for indoor use, while others may be structurally unsound. It is crucial to source pallets explicitly marked as "heat-treated" (HT) or "methyl bromide-free" (MB). These markings guarantee that the wood has been treated safely and is suitable for indoor applications. Once sourced, thorough cleaning and preparation are necessary. This involves removing any nails, staples, or debris, sanding down rough edges, and treating the wood with a suitable sealant or varnish to protect it from moisture and pests.
Safety Precautions and Essential Tools
Working with reclaimed pallets requires appropriate safety measures. Always wear safety goggles and gloves to protect against splinters and potential hazards. A well-ventilated workspace is essential, especially when working with wood treatments or stains. Essential tools for pallet furniture construction include: a hammer, saw (hand saw or circular saw), screwdriver, drill, sander, measuring tape, level, safety goggles, work gloves, and appropriate wood treatment products.
Design Considerations for Small Spaces
The design of pallet furniture for small apartments requires careful consideration of space optimization and functionality. Multifunctional pieces that serve multiple purposes are highly desirable. For instance, a pallet sofa can also incorporate storage underneath the seating area. Similarly, a pallet bed frame can include integrated shelving or drawers. The overall scale of the furniture should be proportionate to the room's dimensions, avoiding overly bulky pieces that overwhelm the space. Consider utilizing vertical space with tall, narrow shelving units to maximize storage capacity without sacrificing floor space.
Designing and Constructing Pallet Furniture
The process of transforming pallets into functional furniture involves a series of steps, ranging from initial design planning to final finishing touches. Successful projects require careful attention to detail and a methodical approach.
Conceptualization and Sketching
Before commencing construction, it is essential to sketch detailed plans of the intended furniture piece. This involves determining the dimensions, the layout of the pallets, and the incorporation of any additional features such as drawers, shelves, or cushions. Consider the overall style and aesthetics of the piece, ensuring its compatibility with the existing décor of the apartment. Accurate measurements are critical to avoid errors during construction.
Disassembling and Reconstructing Pallets
Depending on the design, pallets may need to be partially or completely disassembled. Careful removal of nails and staples is crucial to avoid injury. Once disassembled, individual planks can be rearranged, cut, and reassembled to create the desired shape and structure. The use of strong wood glue and screws is essential to ensure the structural integrity of the finished piece.
Adding Functionality and Enhancing Aesthetics
Adding features such as casters to a shelving unit allows for easy mobility, while integrated drawers or storage compartments enhance practicality. Aesthetic enhancements can be achieved through sanding, staining, painting, or applying a protective varnish. The choice of finish depends on the desired style, with options ranging from a natural, rustic look to a more modern, sleek appearance. Adding cushions or upholstery to pallet seating can significantly improve comfort.
Finishing Touches and Safety Checks
Once the construction is complete, a final sanding is recommended to ensure a smooth surface. Any sharp edges or protruding nails should be addressed to prevent injury. A final coat of varnish or sealant provides protection against moisture and wear. A thorough inspection should be undertaken to ensure structural stability and safety before the furniture is used.
Style and Design Inspiration: Pallet Furniture Ideas for Small Apartments
The versatility of pallets allows for a wide range of design possibilities, catering to diverse styles and preferences. Here are a few examples:
Minimalist Pallet Shelving
Simple, vertical shelving units constructed from disassembled pallets provide a minimalist, space-saving solution for storing books, plants, or decorative items. A clean, uncluttered aesthetic can be achieved by using a neutral paint color or leaving the wood in its natural state.
Rustic Pallet Coffee Table
A low-profile coffee table crafted from a single or double pallet provides a charming, rustic focal point for a living room. Adding casters allows for easy mobility. A simple coat of varnish or a rustic stain enhances the natural wood grain.
Contemporary Pallet Headboard
A headboard constructed from pallets offers a unique and stylish addition to a bedroom. The pallets can be arranged horizontally or vertically, depending on the desired aesthetic. Painting the headboard a bold color or leaving it natural can complement the overall bedroom décor.
Multifunctional Pallet Sofa and Storage Unit
A more ambitious project involves creating a sofa with integrated storage beneath the seating area. This combines comfortable seating with valuable storage space, maximizing functionality in a compact environment. Adding comfortable cushions transforms the piece into a cozy and inviting seating area.
By carefully considering design elements, incorporating safety precautions, and utilizing readily available resources, pallet furniture offers a sustainable and aesthetically pleasing approach to furnishing a small apartment. The possibilities are virtually limitless, allowing for the creation of unique and personalized pieces that enhance both functionality and style within the confines of a limited living space.
Step-by-Step Small Woodworking Projects with Plans
Jump into Woodworking: Easy Projects with Simple Plans
Hey there, fellow woodworkers (aspiring or experienced)! So you're looking to get your hands dirty with some woodworking, but maybe the thought of tackling a massive project feels a bit overwhelming. Don't worry, you're not alone! Starting small is the key to building confidence and skill. This guide is packed with easy-to-follow projects, perfect for beginners, with step-by-step instructions and plans you can actually understand (no confusing jargon here!). Let’s get crafting!

Project 1: A Simple Wooden Coasters Set
This is the perfect beginner project. It's quick, uses readily available materials, and teaches you fundamental skills like cutting, sanding, and finishing. Plus, who doesn't need a stylish set of coasters?
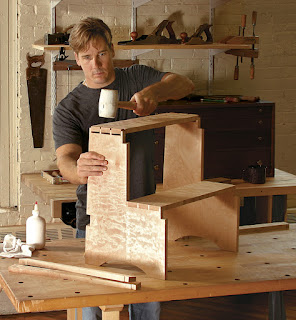
What You'll Need:
- Four pieces of 1/4" thick wood (maple, cherry, or even scrap pieces work great!) - cut to 4" x 4" squares.
- Sandpaper (100-grit and 220-grit)
- Wood glue
- Wood finish (polyurethane, varnish, or even mineral oil)
- Cloth rags
- Optional: Felt pads (to protect your furniture)
Step-by-Step Instructions:
- Sanding: Start with 100-grit sandpaper to smooth out any rough edges. Follow up with 220-grit for a super smooth finish. Sanding is key to a professional-looking project!
- Finishing: Apply your chosen wood finish according to the manufacturer's instructions. Two thin coats are better than one thick coat. Let each coat dry completely before applying the next.
- Adding Felt (optional): Glue felt pads to the bottom of each coaster to protect your surfaces.
That's it! You’ve made your first woodworking project! Pat yourself on the back â€" you deserve it.
Project 2: A Rustic Key Holder
This project is slightly more challenging but still very manageable for beginners. It will teach you about using different tools and assembling pieces together.
What You'll Need:
- A piece of wood (approximately 6" x 10") â€" reclaimed wood adds character!
- Five key hooks
- Screws
- Drill
- Screwdriver
- Sandpaper
- Wood stain or paint (optional)
Step-by-Step Instructions:
- Prep the Wood: Sand the wood to smooth out any imperfections.
- Stain/Paint (optional): If you want to add color, apply your chosen finish and let it dry completely.
- Mark and Drill: Mark where you want to place your key hooks. Using a drill, carefully create pilot holes for your screws.
- Attach Hooks: Attach the key hooks using screws and a screwdriver.
Now you have a handy key holder to keep your keys organized and add a touch of rustic charm to your entryway.
Project 3: A Simple Wooden Box
This project introduces you to the joys of woodworking joints and assembling a more complex structure. Don’t worry; it’s easier than it sounds!
What You'll Need:
- Six pieces of wood (choose your dimensions based on your desired box size â€" you’ll need two pieces for each side and one for the bottom)
- Wood glue
- Clamps
- Sandpaper
- Wood finish (optional)
Step-by-Step Instructions (using simple butt joints):
- Cut the wood: Cut your wood pieces to the required size. Accuracy is important here, so measure twice, cut once!
- Assemble the sides: Apply wood glue to the edges of the sides and assemble them into a rectangular shape. Use clamps to hold everything firmly in place while the glue dries.
- Attach the bottom: Once the sides are dry, glue the bottom piece in place.
- Sand and finish: Sand all edges and surfaces smooth. Apply a wood finish if desired.
Congratulations! You’ve built a wooden box! You can customize this project by adding hinges and a lid.
Tips for Success:
- Start small: Don't bite off more than you can chew. These are just starting points; feel free to adapt them to your skill level and preferences.
- Measure twice, cut once: This old woodworking adage is crucial. Accurate measurements prevent frustration and wasted materials.
- Safety first: Always wear safety glasses and use appropriate safety equipment when working with power tools.
- Have fun! Woodworking should be enjoyable. Don't get discouraged if your first attempt isn't perfect. Embrace the learning process!
Commonly Asked Questions (FAQs)
Q: What kind of wood should I use for these projects?
A: Pine, cedar, and plywood are readily available and easy to work with for beginners. As you get more experienced, you can try hardwoods like maple or cherry.
Q: What kind of tools do I need?
A: For these projects, you'll primarily need sandpaper, a measuring tape, a saw (hand saw or jigsaw), clamps, and wood glue. A drill is helpful for the key holder.
Q: Where can I find plans for more complex projects?
A: Once you've mastered these basics, explore online resources like woodworking websites and YouTube channels. There are tons of free plans available for all skill levels.
Q: How do I finish my wood projects?
A: There are many options: polyurethane for durability, varnish for a glossy finish, and mineral oil for a more natural look. Always follow the manufacturer's instructions.
So there you have it! Three simple woodworking projects to get you started. Remember, the most important thing is to have fun and learn as you go. Happy crafting!